

The detector is assembled. The permission is sorted. You are standing in a field, and the machine is making noises, and you are not entirely sure which ones matter. You have dug three holes and found nothing useful. Somewhere in the next field, another detectorist seems to be finding something every ten minutes, and you cannot work out what they are doing differently.
This is where almost every beginner ends up within the first hour, and it is a much more solvable situation than it feels in the moment. The gap between a confusing first session and a genuinely productive one is not better equipment, and it is not luck. It is understanding a small number of settings and one simple physical technique, and both are things you can learn before you leave the house.
This guide walks through everything a UK beginner needs for their first session: how to set up the detector correctly, which settings actually matter and what to do with them, how to swing the coil in a way that gives every buried target a fair chance of registering, how to read the signals your machine gives you, and how to recover a target cleanly once you have found one.
Before any of the technical details become relevant, there are two things that have to be in place before you go anywhere with a detector. Neither is complicated, and both matter enough that skipping either one creates problems you would rather not deal with.
Every piece of land in the UK has an owner, and that includes farmland, parkland, beaches above the high tide mark, woodland paths, and common ground. Public access rights give you the right to walk across certain land. They do not give you the right to dig in it. Before you go anywhere with your detector, you need explicit permission from the landowner, ideally confirmed in writing, and that requirement applies to your very first session as much as to any other.
The National Council for Metal Detecting is the UK’s main representative body for detectorists, and membership includes public liability insurance that protects both you and the landowner if anything goes wrong on their property. Most landowners will ask whether you’re insured before granting permission, and most organised club events and rallies require NCMD or FID membership as a condition of entry. The NCMD Code of Conduct for metal detecting in the UK sets out the framework every responsible detectorist operates within, and reading it before your first session is worth five minutes of your time. Joining takes minutes and costs very little. Sort it before you go, not after.
With permission in place and membership sorted, the next step is getting your detector ready before you leave the house.
Arriving at a site with a detector you have never powered on is one of the most preventable sources of first-session frustration. The field is not the right place to figure out how the shaft adjusts or whether the battery is flat.
Follow the manufacturer’s instructions to put the shaft together, attach the coil, and route the cable properly so it is not hanging loose. Power it on, pass a coin under the coil, and confirm that the machine responds with an audio signal and a number on the screen. Check the battery level while you are at it. A forty-minute drive to a site only to find a dead battery is entirely avoidable and thoroughly dispiriting, so check it the night before.
You do not need to understand everything your detector can do before your first session. You need to understand four things: sensitivity, discrimination, ground balance, and whatever preset modes your machine offers. Most modern beginner detectors come with preset programmes, often labelled coins, all-metal, or relic, and these are a perfectly good starting point for a first session. Select coins or all-metal mode; do not adjust anything else until you understand what the settings actually do, and work from there.
Bury a coin and a nail at a depth of roughly 10 centimetres in your garden, then run your detector over both. Note what number appears on the screen for each and what audio tone each one produces. This single exercise teaches you more about your specific machine’s target ID language than an hour of reading about it, and it means that when a genuine target signals in the field for the first time, you already have a reference point for what good and bad look like on your detector rather than starting from zero.
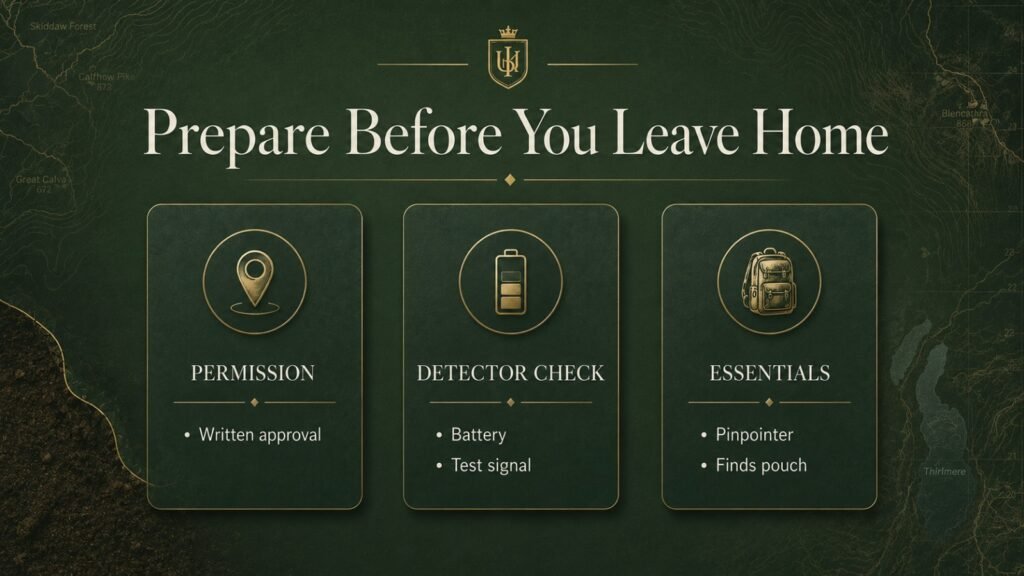
With the detector assembled and tested, the settings are where most beginners either get things working well or start creating problems for themselves. Three settings matter for a first session. Everything else can wait.
Sensitivity controls how hard the detector is listening to the ground beneath the coil. At maximum sensitivity, it hears everything, including mineral noise in the soil, electrical interference from power lines, and tiny metal fragments that are not worth digging. For a beginner on an unfamiliar site, maximum sensitivity almost always produces a machine that signals constantly and makes it genuinely difficult to tell real targets from background noise.
The right approach is to start at medium sensitivity, usually the midpoint of whatever scale your machine uses, then raise it gradually until the detector starts chattering or giving false signals between real targets. When it starts to feel unstable or noisy without a target present, bring it back down one or two steps. That point where the machine is stable but running as high as the conditions allow is your correct starting sensitivity for that site. Wet ground, mineralised soil, and nearby power lines all require slightly lower sensitivity than dry inland farmland.
Discrimination filters out certain target types based on their electrical conductivity, and on most detectors, it is represented as a number scale from 0 to 99. Iron and ferrous debris sit at the low end of that scale. Silver coins sit at the high end. The sensible approach for a first session is to set discrimination to reject iron only, roughly 0 to 15 on most machines, and dig everything else. The temptation for beginners is to filter aggressively to avoid digging rubbish, but aggressive discrimination means missing targets that fall in the same conductivity range as common junk. Small gold, medieval bronze, and worn copper coins all read in ranges that a high discrimination setting silences without warning you.
For a full explanation of how discrimination works and why lower settings almost always produce better results on UK farmland, the metal detector discrimination guide covers it in depth.
Ground balance calibrates the detector to the mineral content of the specific soil you are searching, so it can filter out the ground’s own response and focus on buried metal. Without it, UK soil creates enough background signal that real targets get lost in the noise, and UK ground varies considerably from Norfolk’s light arable to Cornwall’s mineralised granite upland. Most beginner detectors have an automatic ground balance function, usually a single button held over a clean, metal-free patch of soil. Press it at the start of every session before you begin searching. It takes fifteen seconds, and the difference in how stably and how deeply the machine performs is significant enough that skipping it is a genuine handicap.
For a full explanation of what ground balance is doing and how to set it correctly for different UK soil types, the metal detector ground balance guide goes into much more depth than we have space for here.

With those settings in place, the next thing to get right is the physical technique. Good settings on a detector swung badly will still produce a frustrating session. The mechanics of how you move the coil across the ground are as important as anything on the settings menu.
The coil should pass as close to the ground as possible without actually touching it, roughly 1 to 2 centimetres above the surface. Every unnecessary centimetre of height costs detection depth, and a coil swinging 5 centimetres above the ground because the shaft is set too long is losing a meaningful portion of its effective range on every single pass. Check your shaft length before your first session: with the detector held naturally at your side, the coil should sit flat and level just above the ground without any hunching or stretching. Most shafts are adjustable and take a minute to set correctly at home.
The most consistent mistake beginners make is swinging too fast and moving forward too quickly between passes. A detector needs a moment of contact with the target’s signal to process it properly, and a fast swing gives each buried target a fraction of the time it needs. Sweep the coil in a gentle side-to-side arc of roughly 50 to 70 centimetres, move forward only after each complete sweep, and overlap each new pass with the previous one by about 30 percent. This methodical approach gives every buried target the coverage it needs to register clearly, and it covers the ground properly rather than leaving gaps that could contain exactly what you came to find.
The coil should stay parallel to the ground throughout the entire arc, not just at the centre of the swing. Tipping it upward at the ends of each pass, which happens naturally when beginners swing too wide or too fast, creates false signals at the edges and reduces depth in the middle, where the coil’s detection power is at its greatest. Practising the motion slowly in the garden before your first session, paying attention to keeping the coil flat at the extremes of each arc, builds the muscle memory that makes it automatic in the field.
Every detector behaves a little differently, and UK ground conditions can vary from one location to another. If you’re unsure which settings to use or you’re choosing your first detector, our team is happy to help you get started with confidence.
Whether you need advice on sensitivity, ground balance, discrimination, or choosing the right detector for your budget, we’ll give you honest, practical guidance based on real detecting experience.

That said, the best technique in the world only gets you as far as the signal. Knowing what to do with the audio and the numbers your machine gives you is the skill that turns a good swing into a found target.
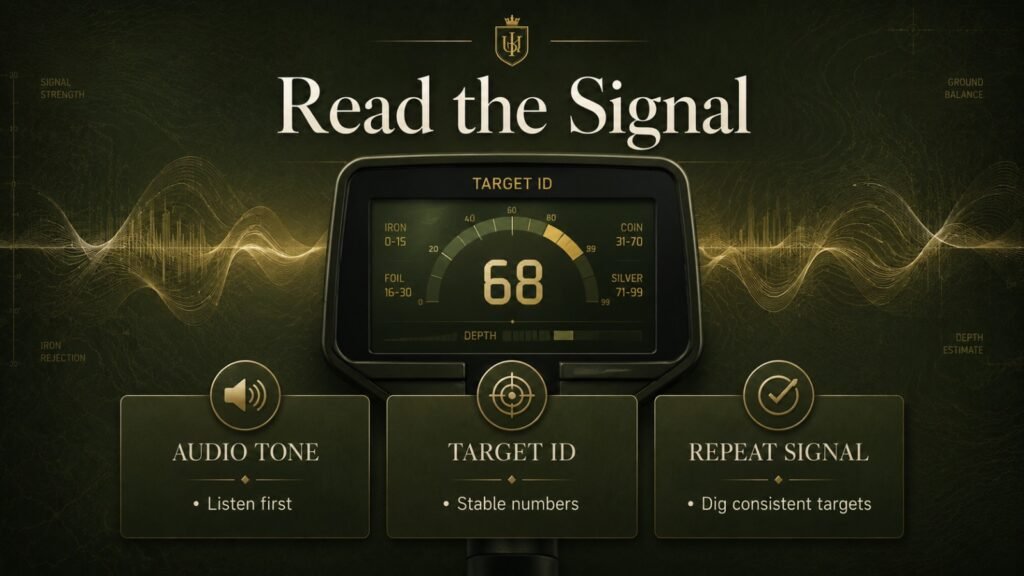
Every signal your detector gives you has two components: the audio tone and the target ID number on the screen. Most modern machines produce different tones for different target types: a low grunt or growl for iron, a mid tone for mid-conductivity targets like bronze and brass, and a high clear tone for silver and copper coins. The number on screen represents where the target sits on the 0 to 99 conductivity scale. Iron reads between 0 and 15 on most machines. Small gold reads between 25 and 45. Silver coins typically range between 75 and 95. You do not need to memorise these ranges before your first session, but you will find them becoming instinctive after a few hours in the field.
A genuine buried target produces a consistent, repeatable signal every time the coil passes over it. Pass the coil across the same spot from multiple angles, left to right first, then top to bottom. A real target signals on every pass and gives an ID number that stays in roughly the same range with each sweep. A signal that fires on one pass but disappears on the next, or an ID number that bounces wildly across the scale with every sweep, is almost always mineralised ground noise, a tiny fragment, or a badly corroded piece of junk sitting at an odd angle. Dig the consistent, repeatable signals. Investigate the inconsistent ones carefully before committing to a dig.
Stop moving forward as soon as you hear a signal worth investigating. Swing the coil back and forth over the same spot a few times to confirm it is consistent and to narrow down exactly where the signal is strongest. If your detector has a pinpoint mode, switch into it. This changes the audio from a broad sweep response to a precise peak directly over the target’s position. Note the target ID and the tone, mark the spot, and dig.
Knowing what the signal means gets you to the dig. How you dig is what landowners notice, what other detectorists notice, and what determines whether you keep permission on a site long-term.
A poorly recovered hole with ragged edges, scattered soil, and a plug that does not sit flush is the thing most likely to cost you future access to good ground. Landowners notice the state of their fields after a detecting session, and a badly filled hole on grassland is a genuine hazard to livestock and farm machinery. A good recovery technique is not optional politeness. It is the basic standard that keeps land accessible to detectorists, and it starts from your very first dig.
Use a digging tool to cut a neat, horseshoe-shaped plug on three sides, folding the grass back on the uncut fourth side like a hinge. This keeps the plug attached and the roots intact. Dig into the hinge side until the signal moves into the plug itself, then check both the hole and the plug separately with your pinpointer. Once the target is recovered, replace the plug, press it firmly flat with your foot, and check that the surface sits level. Done properly, the ground should look undisturbed from a metre away within a week, and a landowner walking that field will have no reason to question whether allowing you back was a good idea.
Ploughed farmland is more forgiving than grassland because the soil is already loose and there is no turf to protect. Cut a neat, square opening rather than a plug, remove soil carefully until you locate the target, recover it with a pinpointer, then replace the soil and press it level with your foot. Even on farmland, leaving a mound of loose soil or a wide, ragged hole is not the standard to aim for. Tidy recovery on every dig, regardless of what the ground looks like, is what builds the reputation that keeps you detecting.

Good recovery technique brings the target out of the ground. Handling it correctly from that point on is the next skill to develop.
The instinct when something comes out of the ground is to rub the soil off on your jacket or the knee of your trousers to see what it is. This is one of the most damaging things you can do to a find. Soil particles are abrasive, and a single wipe across the face of a thin hammered silver coin can leave scratches that permanently reduce its legibility and its value. Leave it dirty, put it in a small finds bag or a pill box, and clean it properly at home using the correct method for the type of metal it is.
The guide to cleaning coins found metal detecting covers the right approach for every UK coin type.
Before the find goes in your bag, take a photograph of it in the hole and note the location: a GPS pin from your phone, a grid reference, or a clear written description of where on the site you were. This takes thirty seconds and matters significantly if the find later turns out to be historically important. Under the Treasure Act 1996, certain finds, primarily gold or silver objects over 300 years old, must be reported to the local coroner within 14 days of discovery.
The guide to what to do when you find something metal detecting UK walks through the full process, including what qualifies, who to contact, and what happens next.
The habit of recording your finds carefully is what separates detectorists who steadily improve from those who stay stuck at the same level for years.
A simple notebook or notes app recording the target ID number, the audio tone, the depth, the site location, and what the find actually was builds an invaluable reference over time. After twenty or thirty digs on the same site, patterns become clear: which ID ranges produce genuine finds on that specific ground, which produce consistent junk, and which signals at which depth are worth investigating on your specific machine. That knowledge is site-specific and machine-specific, and no amount of reading gives you what your own recorded sessions do.
The Portable Antiquities Scheme, managed by the British Museum, is the UK’s national database of finds made by members of the public. Recording your finds voluntarily is free, takes a few minutes either online or in person with your local Finds Liaison Officer, and contributes directly to the national historical record. Your FLO can also help identify uncertain finds, provide historical context, and handle Treasure Act reporting if something significant comes up. It is one of the clearest ways to demonstrate that metal detecting in the UK is a responsible, valued hobby, and it costs you nothing to participate.
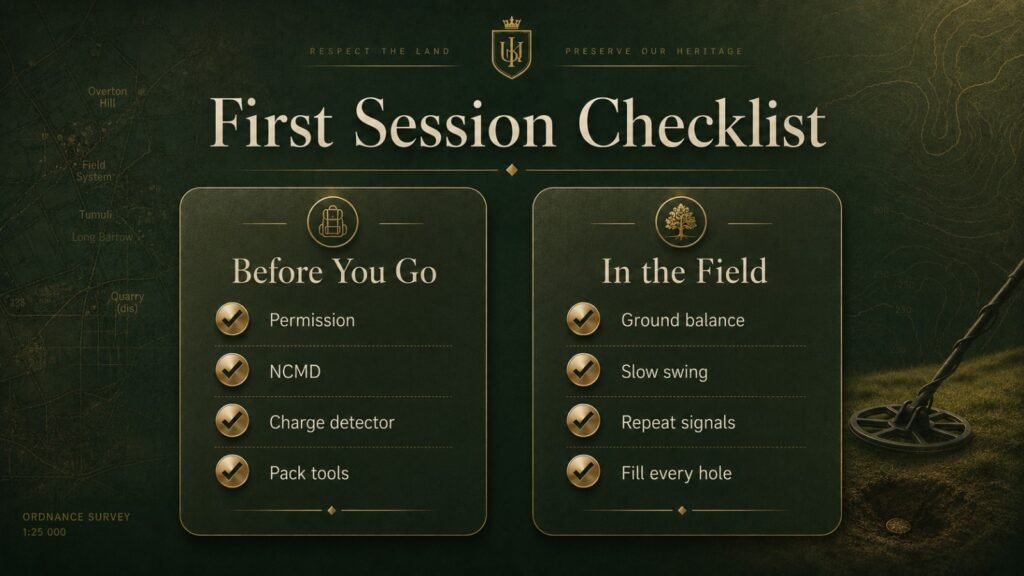
| Before You Go | In the Field |
| NCMD membership sorted | Ground balance at the start of every session |
| Written permission confirmed | Sensitivity stable, not maximum |
| Detector assembled and tested at home | Discrimination set to reject iron only (0–15) |
| Garden test with coin and nail done | Coil 1–2cm above ground, level throughout swing |
| Finds bags and digging tools packed | Overlap each swing by 30% |
| Pinpointer charged | Dig repeatable signals only |
| Permission document with you | Cut a neat plug, fill every hole flush |
| Photograph and record every find |
The first session is not really about the findings. It is about learning how your machine speaks, building the habit of good technique and good recovery, and discovering what UK detecting actually feels like when you are doing it properly.
Most detectorists who are still in the hobby years later can describe the moment in their early sessions when everything clicked: the settings were right, the swing was slow and low, the signal was consistent from multiple angles, and something came out of the ground that had been there for decades or longer. That moment is not reserved for experienced detectorists. It is available to anyone who takes the time to understand their equipment before standing in a field expecting it to do all the work on their behalf.
The right technique is only part of the equation. Choosing a detector that’s suited to your experience level and the ground you search can make every outing more enjoyable and more productive.
Whether you’re buying your first metal detector or upgrading to a machine with better depth, target separation, and easier setup for UK conditions, the team at UK Metal Detectors is here to help.
Browse our range of beginner and advanced metal detectors, compare leading brands, or speak to our experts for honest advice before you buy.
Before detecting, make sure you have the landowner’s permission and set up your detector at home. Ground-balance the detector, use medium sensitivity, reject iron only with discrimination, and swing the coil slowly about 1–2 cm above the ground with 30% overlap. Dig only repeatable signals that sound consistent from different directions.
The three most important settings are sensitivity, discrimination, and ground balance. Start with medium sensitivity, reject only iron (typically 0–15), and ground-balance the detector before every session. Using a preset Coins or All-Metal mode is also a good starting point for beginners.
Keep the coil level and about 1–2 cm above the ground throughout the entire sweep. Move at a slow, steady pace and overlap each sweep by around 30% to avoid missing targets. A slow, controlled swing produces more accurate signals and better depth than swinging too quickly.
Look at both the audio tone and the target ID number. Good targets usually produce a clear, repeatable signal with a stable target ID from multiple sweep directions, while inconsistent tones and jumping numbers often indicate ground noise or junk metal.
Yes. You must have permission from the landowner before using a metal detector anywhere in the UK. Detecting without permission is trespass, and most landowners also expect detectorists to have NCMD or FID membership because it includes public liability insurance.